一、下载并安装
1)下载
https://github.com/google/protobuf/releases
下载源码Source code (tar.gz)
2)解压
tar -xvf protobuf-3.6.1.tar.gz
3)编译安装
cd protobuf-3.6.1

./autogen.sh

./configure

make

make install
注意:
configure: WARNING: no configuration information is in third_party/googletest
需要下载googletest,下载地址:https://github.com/google/googletest/releases,解压后放在./protobuf-3.6.1/third_party/googletest,然后执行./autogen.sh之后的
二、配置LD_LIBRARY_PATH
新建/etc/ld.so.conf.d/libprotobuf.conf (vim /etc/ld.so.conf.d/libprotobuf.conf ),内容如下:
/usr/local/lib
然后,需要执行命令
sudo ldconfig
添加路径
# vim /etc/profile
LD_LIBRARY_PATH=/usr/local/lib:$LD_LIBRARY_PATH

# source /etc/profile
三、golang简单测试
go get github.com/golang/protobuf/protoc-gen-go@v1.3.2
此时会在你的GOPATH 的bin目录下生成可执行文件
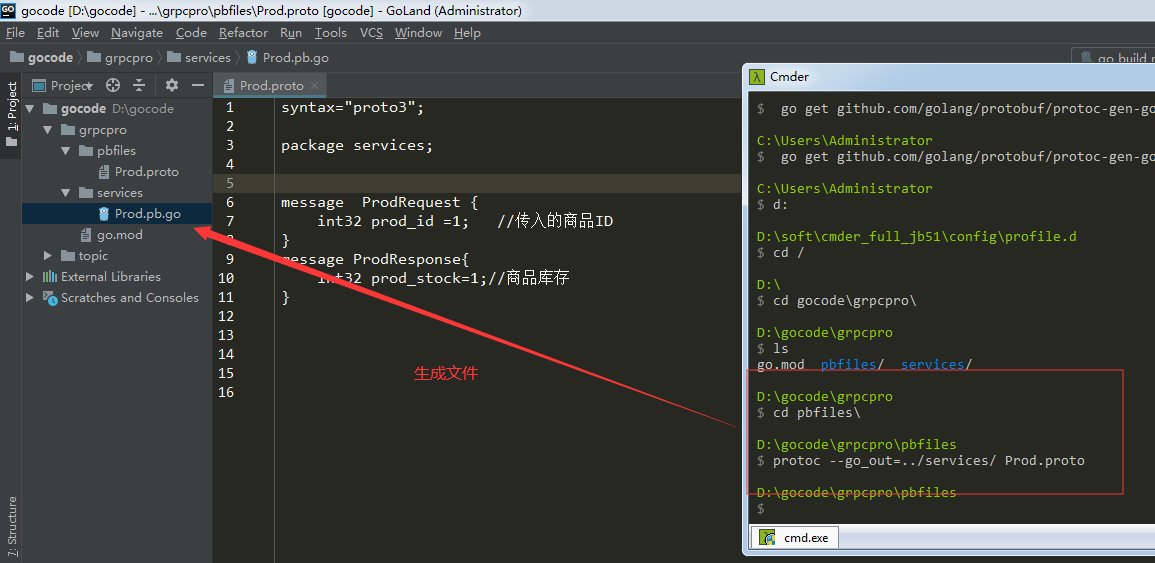
创建中间文件
syntax="proto3";
package services;
message  ProdRequest {
    int32 prod_id =1;   //传入的商品ID
}
message ProdResponse{
    int32 prod_stock=1;//商品库存
}
然后执行 protoc --go_out=../services/ Prod.proto
文件目录格式如下

